Showing posts with label decorating. Show all posts

Tuesday, July 24, 2012

Progress in the Bath Redo


Albeit slow, we are making some progress non-the-less.


This has got to be the longest room redo evah!  
I've almost lost track when we first started working on this room, our master bath.  Maybe two years ago or longer?  What's held us up currently is Hubby can't raise the tub faucet to accommodate the tile because of the way the plumbers originally hooked everything in.  So, we were kind of at a standstill there until we could get a plumber in here to do the work.  After a while, I realized there was no reason why I can't get started on the painting, etc.  


It's really just a major facelift redo then a total renovation.  
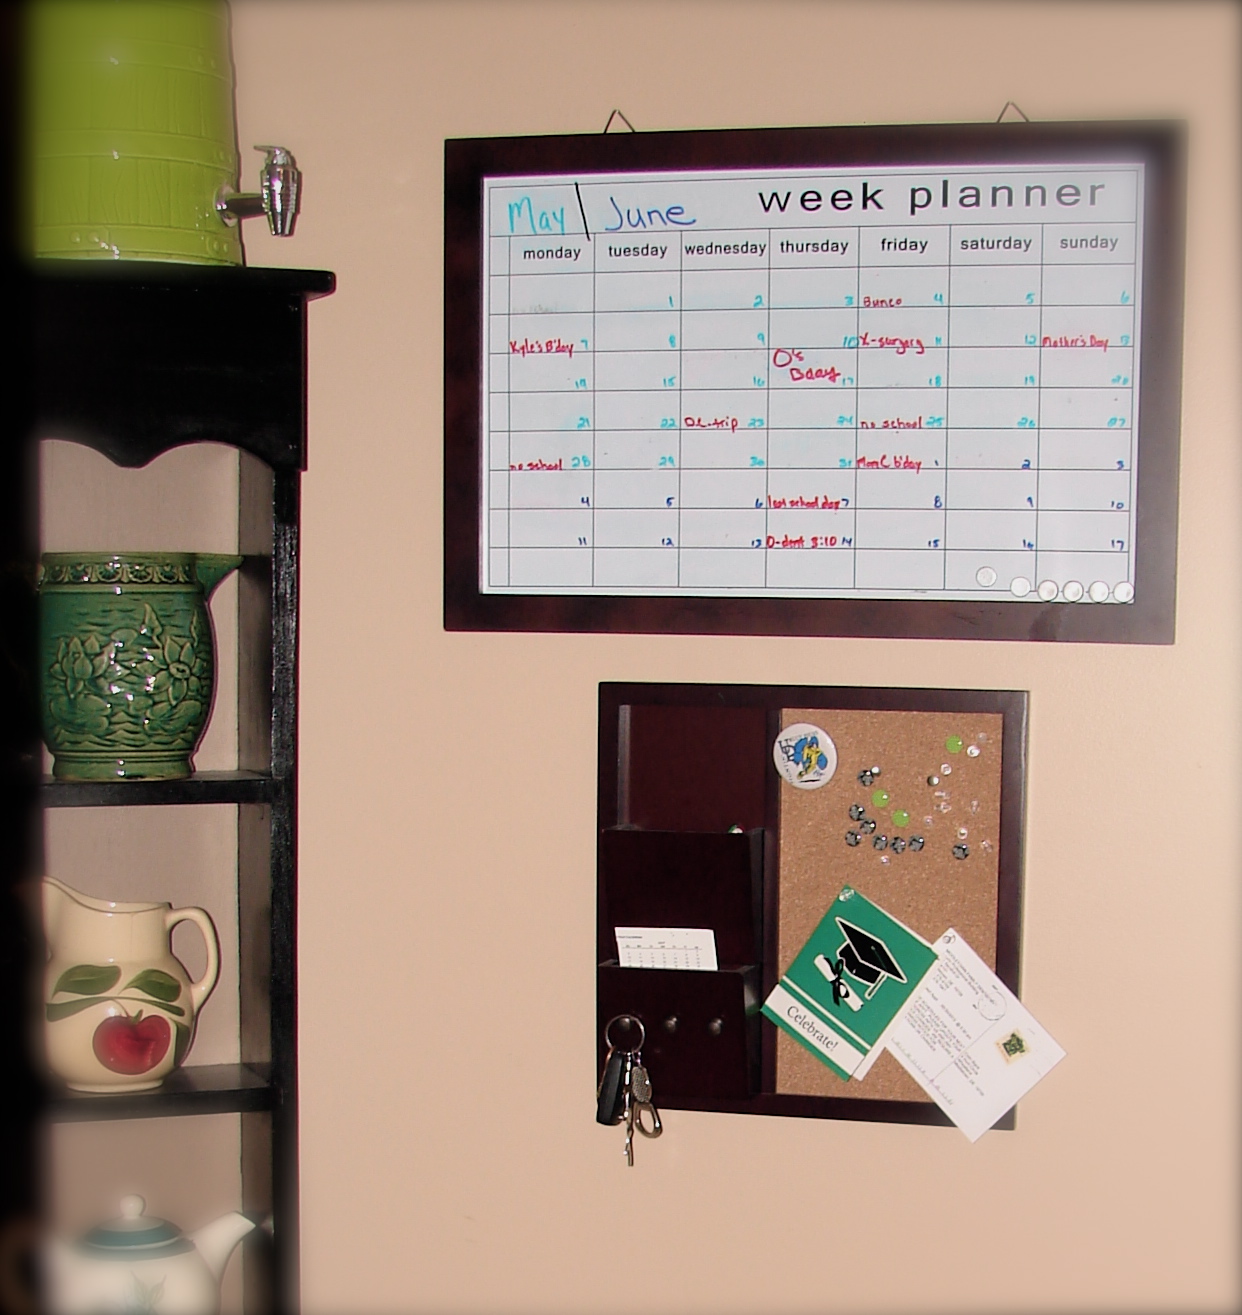
Adding tile around the whirlpool tub, replacing the vinyl flooring with tile and new vanity counter top with glass tile backsplash.  Fresh paint on the walls and painting and adding trim to the vanity base is also in the works.  Also replacing and painting baseboards and trims.


My plan for the doors of the cabinet are to add thin pieces of wood to all four edges and one down the center before painting. And, of course, new door knobs and hinges.  I saw this done in an issue of 
The Lettered Cottage Summer Fun e-zine put together last year.  
You can view this great e-zine here.


I would love to gut this room and start from scratch, but that would be a renovation nightmare, not to mention quite costly.  Since it's our master bath, and only me and Hubby use it, or even see it, we just couldn't warrant the expense.  And, besides, there's nothing wrong with any of the main components of the room.  It was all just a bit dated and tired-looking.  

The look I'm going for is a cross between spa and coastal.  And I think I'm getting there.  I was worried about the wall paint color, Lowe's Valspar Hi-Def Beach House in egg shell, 


with the dove grey fixtures - toilet, tub, shower.  I was afraid it would all look too washed out along with the new mottled grey tumbled stone tile we're using and the new faux granite countertop installed a few months ago.


But, it's really working for me!  I'm sure once I get to the decorating stage adding some slightly darker, natural elements like the matchstick roller shade, it will work even more!


As you can see by the pics I'm sharing, we don't always do everything in the order that's practical.  For instance, I should have completed painting the vanity before the new top was installed.  Or finished painting the walls and ceiling before installing the new vanity light and chandelier over the tub.


Ooooo . . . that chandelier!!!!  


Ain't she purdee!!!


I'm in deep, deep love with this new fixture, can I just tell you!  I can't stop going in there and just looking at it.  What a huge difference a beautiful light can make.  I purchased this light, and the new vanity light, at Overstock.com.  The chandelier was around $100 and the vanity light was like $40, with free shipping!  


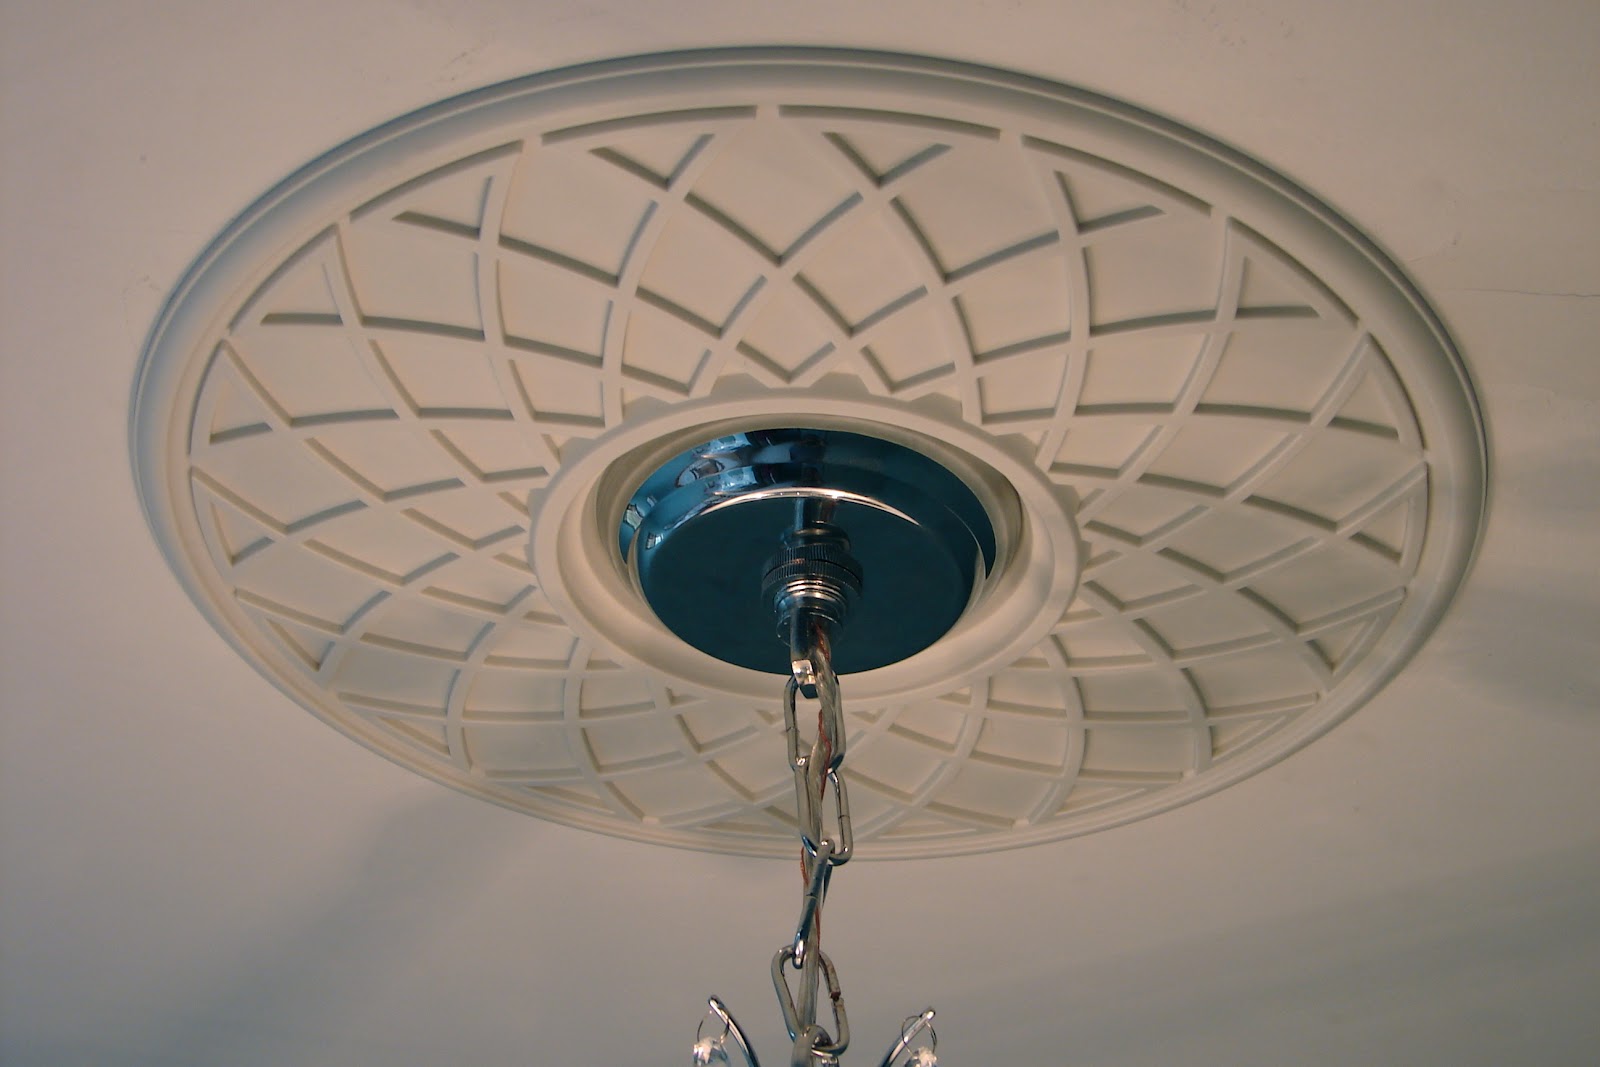
It's million percent better then what's been there in the past.  Originally an ugly, plastic fan/light contraption that I replaced with a not much better looking ceiling mount light a bunch of years ago.  That ceiling medallion, although a gorgeous accent to the light, was actually a necessity to hide the box that held the original fan/light fixture the builder installed.

Our next hurdle is going to be choosing the floor tiles.  We're wanting to do rectangular stone in a charcoal kind of color.  But the biggest hurdle by far is going to be trying to figure out how to accessorize the back area of the tub.  The builder situated the 6 foot long tub {which is nice by the way for tall people like me!} on an angle in the corner.  


I've never been able to successfully decorate that area.  What I kind of have in mind is finding, or purchasing new and painting and distressing, some columns . . . porch columns . . . something like that.  Using a variety of heights and styles, creating some architectural interest back there.  Oh, and towards the one corner near the "top" of the tub to the right,  we're mounting a small flat screen.  Nice, huh?!  

Any and all suggestions would be greatly appreciated regarding that massive triangle back there!

So, this is where we are so far.  A busy week and upcoming weekend will mostly put what little progress we've made on hold again for a short while.  But at least I can actually see a bit of the light at the end of that long tunnel.  And getting this far is making me itch to get that much more done.  

I'll keep you all updated!


Thanks for visiting!
Leave a comment so I can get to know you.

Saturday, June 2, 2012

Upcycled Crib Spring

This is something I've wanted to do for a while now.  


Upcycle the crib springs from the crib all three of my boys used.  Along with so many of you I'm sure, I first saw this idea at Funky Junk Interiors.  


Funky Junk Interiors
I just love Donna's style and creativity with junk!

When I saw that post, I knew immediately I wanted to copy it.  Of course, Hubby thought I was nuts!
  
"What?! Crib springs on the wall?  I don't think so."


Well, I finally did it.  I have an area in the kitchen that's near the back hall that leads to the powder room, laundry and garage door.  It's kind of dead space that we've been talking about for years having a shallow custom shelving unit built there.  As you can see, still waiting on that.  


Anyway, I've had a variety of different things in this space and on the wall.  The last thing I had was a dry erase calendar and a small tack board with organizing slots and hooks for keys, etc.  


Well, it just wasn't really working.  I could never really get the calendar clean of the marker, the little tack board was never really used and only Son No. 1 would hang his keys on the hooks.


Down it all went one day, and up went the springs.  I thought about painting the springs, but for now I'm going to leave them as is.  And, I haven't done anything fancy on them like Donna from Funky Junk Interiors did, or all the others whose pics I've saved for inspiration.  

I was truly amazed at all the cool ways people have used these old crib springs.  I'm sharing my collection of inspiration pictures.  I wish I would have made note of exactly where I found these pics on the web.  I wasn't originally saving them to share, but for my own inspiration.  So, if any of the pics belong to you, or you know who they do belong to, please let me know so I can give credit.

Oh, and guess what, I think Hubby doesn't mind the springs too much now that it's on the wall.  As a matter of fact, he suggested I paint it antique white ;o)  


Junk Sophisticate 

Aren't they great ideas and uses for something that would be otherwise tossed into the landfill.  I think it's not only a useful way to reuse something that would be trashed, but it also adds detail and dimension to a wall, and it's a pretty cool conversation piece!


Thanks for visiting!
Leave a comment so I can get to know you.

Saturday, May 12, 2012

Changes

Wow!
Has it really been over 2 weeks since I last posted?  Wish I could say it was because I've been mad busy getting all sorts of things done around here, but I can not.


I have gotten a few things done in the way of some small changes on a few of my walls.   Nothing super-major.  Just a bit of rearranging here and there.

It's funny how I'm always changing table top vignettes all over the place to reflect the seasons, my mood, whatever.  But I almost never change anything on the walls.  And I'm amazed at how so many of my favorite bloggers do that - change their wall vignettes often

I guess, for me, it's the thought of "gotta fill those holes, then touch up with paint", and it just seems like extra work.

Well, I couldn't take it any more!  I've been realizing that for, well, as long as I can remember, I've had the same things, in the same spots on my walls in the family room.  
Booorrrringgg!!!

So, I finally made some changes.  Nothing wowing or jaw dropping, but change just the same.  And change is good, right?


The first place I changed was the wall above the couch.  Gone are the mirror, bird prints and little shelf thingy holding a potted plant that have been there for, I bet, a dozen or more years!

I shopped my bedroom for the shelf.  Gave it and the Family Rules sign a coat of glaze to tone down the bright white a bit.


I'm loving the Family Rules sign, by the way.


An inexpensive Walmart find.  Eleven bucks!


A couple $3 lanterns picked up at Lowes, and real abandoned bird's nest from last year.


Nothing too exciting, but certainly different then what was there before.  I'm sure I'll probably be changing the shelf a lot.  Which is better then having to fill holes and touch up with paint ever so often!

Now, what I'm really excited about are my new herb boxes below.


When I saw them in Country Living's Bargain issue, I immediately ran to the computer and ordered them from Farmhouse Wares.  Love their stuff!


Took me a couple weeks to get them up on the wall after they arrived.  I had to find the right spot for them.  I'm hoping to pick up a few faux herb plants to fill them.  But for now, I can live with what I stuck in them.

I changed a few other things that really were much less exciting then what I've shared in this post.  All in all, I'm happy with the changes.  Even if some of the changes were moving things to different walls.
As I mentioned earlier, change is good!


Thanks for visiting!
Leave a comment so I can get to know you.

Monday, April 2, 2012

The Always Changing Picture Frame


I have certainly gotten tons of mileage out of this old picture frame.
I haven't changed it's place on the wall, or it's color.  

I've just been changing the inside content to reflect the holiday/season 
by popping out the old and replacing it with something new.


It was first introduced back at Christmas framing out some festive 
pattern paper covered chipboard letters.


After Christmas, it exuded a bit of love.  
This time with painted chipboard letters mounted to music sheet collage paper


Now, it's alive with springy, Eastery colors.  
This picture was actually a page from a past year's calendar.  


Mmmm . . . wonder what I'll come up with next?


Thanks for visiting!
Leave a comment so I can get to know you.
Related Posts with Thumbnails