Showing posts with label PAINTING. Show all posts

Tuesday, July 24, 2012

Progress in the Bath Redo


Albeit slow, we are making some progress non-the-less.


This has got to be the longest room redo evah!  
I've almost lost track when we first started working on this room, our master bath.  Maybe two years ago or longer?  What's held us up currently is Hubby can't raise the tub faucet to accommodate the tile because of the way the plumbers originally hooked everything in.  So, we were kind of at a standstill there until we could get a plumber in here to do the work.  After a while, I realized there was no reason why I can't get started on the painting, etc.  


It's really just a major facelift redo then a total renovation.  
Adding tile around the whirlpool tub, replacing the vinyl flooring with tile and new vanity counter top with glass tile backsplash.  Fresh paint on the walls and painting and adding trim to the vanity base is also in the works.  Also replacing and painting baseboards and trims.


My plan for the doors of the cabinet are to add thin pieces of wood to all four edges and one down the center before painting. And, of course, new door knobs and hinges.  I saw this done in an issue of 
The Lettered Cottage Summer Fun e-zine put together last year.  
You can view this great e-zine here.


I would love to gut this room and start from scratch, but that would be a renovation nightmare, not to mention quite costly.  Since it's our master bath, and only me and Hubby use it, or even see it, we just couldn't warrant the expense.  And, besides, there's nothing wrong with any of the main components of the room.  It was all just a bit dated and tired-looking.  

The look I'm going for is a cross between spa and coastal.  And I think I'm getting there.  I was worried about the wall paint color, Lowe's Valspar Hi-Def Beach House in egg shell, 


with the dove grey fixtures - toilet, tub, shower.  I was afraid it would all look too washed out along with the new mottled grey tumbled stone tile we're using and the new faux granite countertop installed a few months ago.


But, it's really working for me!  I'm sure once I get to the decorating stage adding some slightly darker, natural elements like the matchstick roller shade, it will work even more!


As you can see by the pics I'm sharing, we don't always do everything in the order that's practical.  For instance, I should have completed painting the vanity before the new top was installed.  Or finished painting the walls and ceiling before installing the new vanity light and chandelier over the tub.


Ooooo . . . that chandelier!!!!  


Ain't she purdee!!!


I'm in deep, deep love with this new fixture, can I just tell you!  I can't stop going in there and just looking at it.  What a huge difference a beautiful light can make.  I purchased this light, and the new vanity light, at Overstock.com.  The chandelier was around $100 and the vanity light was like $40, with free shipping!  
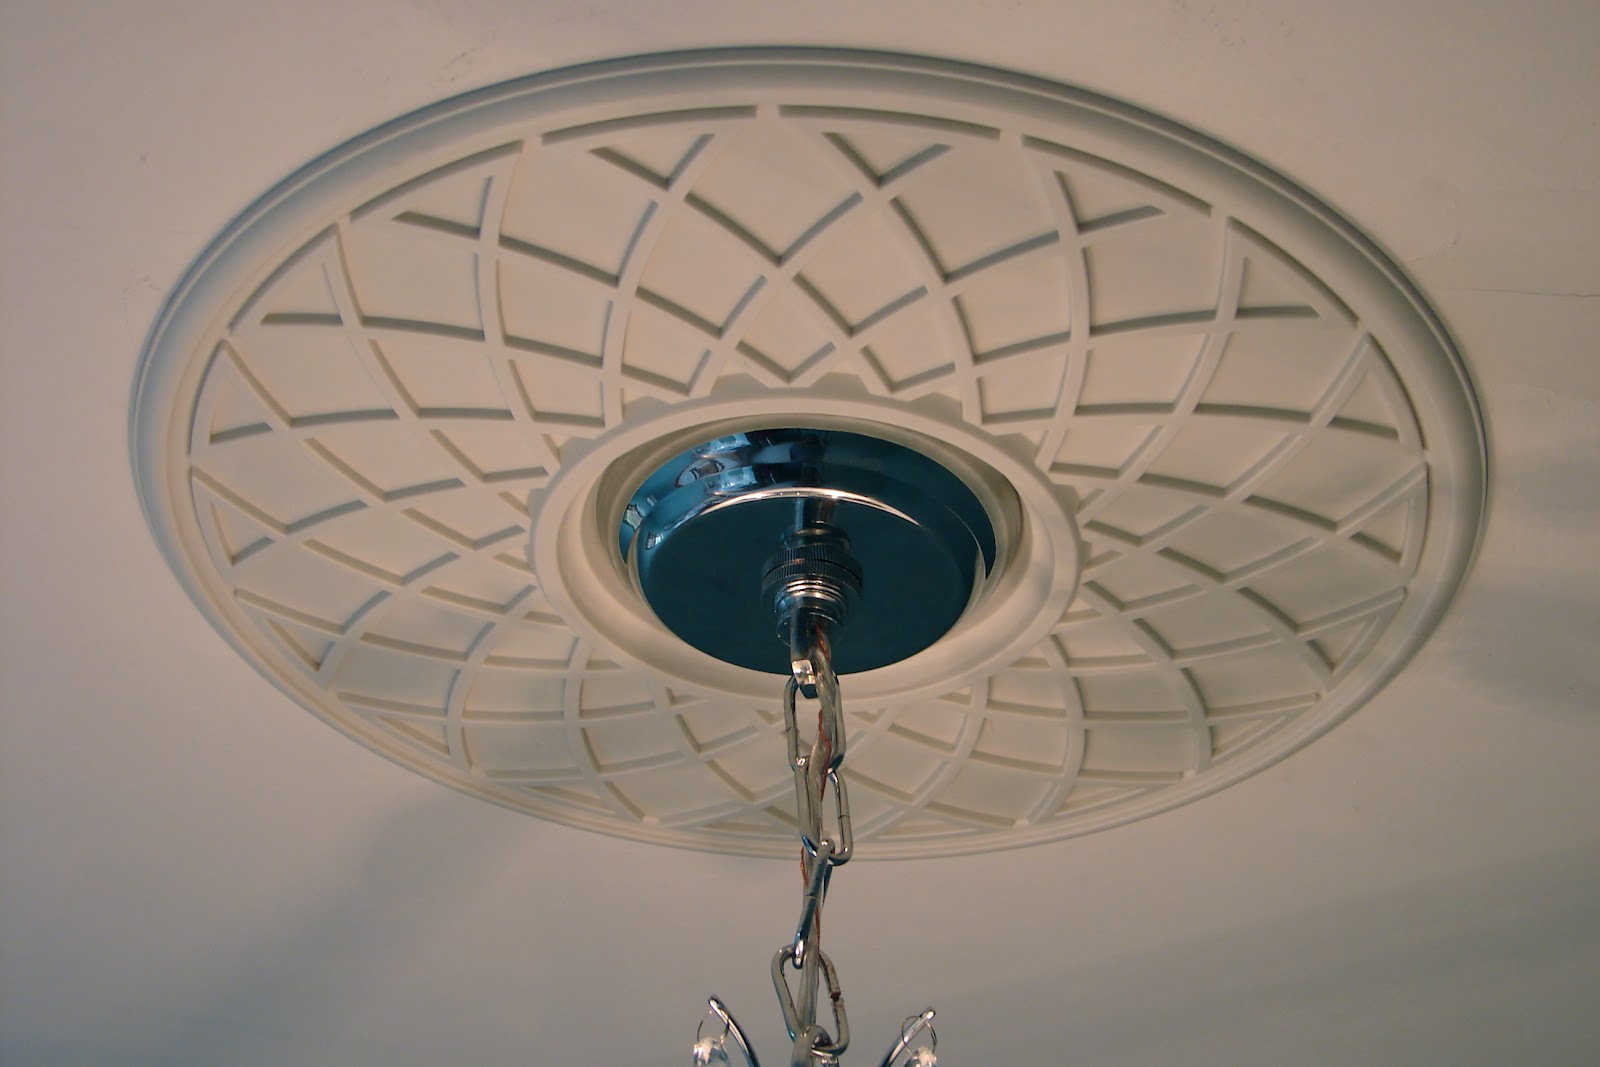

It's million percent better then what's been there in the past.  Originally an ugly, plastic fan/light contraption that I replaced with a not much better looking ceiling mount light a bunch of years ago.  That ceiling medallion, although a gorgeous accent to the light, was actually a necessity to hide the box that held the original fan/light fixture the builder installed.

Our next hurdle is going to be choosing the floor tiles.  We're wanting to do rectangular stone in a charcoal kind of color.  But the biggest hurdle by far is going to be trying to figure out how to accessorize the back area of the tub.  The builder situated the 6 foot long tub {which is nice by the way for tall people like me!} on an angle in the corner.  


I've never been able to successfully decorate that area.  What I kind of have in mind is finding, or purchasing new and painting and distressing, some columns . . . porch columns . . . something like that.  Using a variety of heights and styles, creating some architectural interest back there.  Oh, and towards the one corner near the "top" of the tub to the right,  we're mounting a small flat screen.  Nice, huh?!  

Any and all suggestions would be greatly appreciated regarding that massive triangle back there!

So, this is where we are so far.  A busy week and upcoming weekend will mostly put what little progress we've made on hold again for a short while.  But at least I can actually see a bit of the light at the end of that long tunnel.  And getting this far is making me itch to get that much more done.  

I'll keep you all updated!


Thanks for visiting!
Leave a comment so I can get to know you.

Monday, June 11, 2012

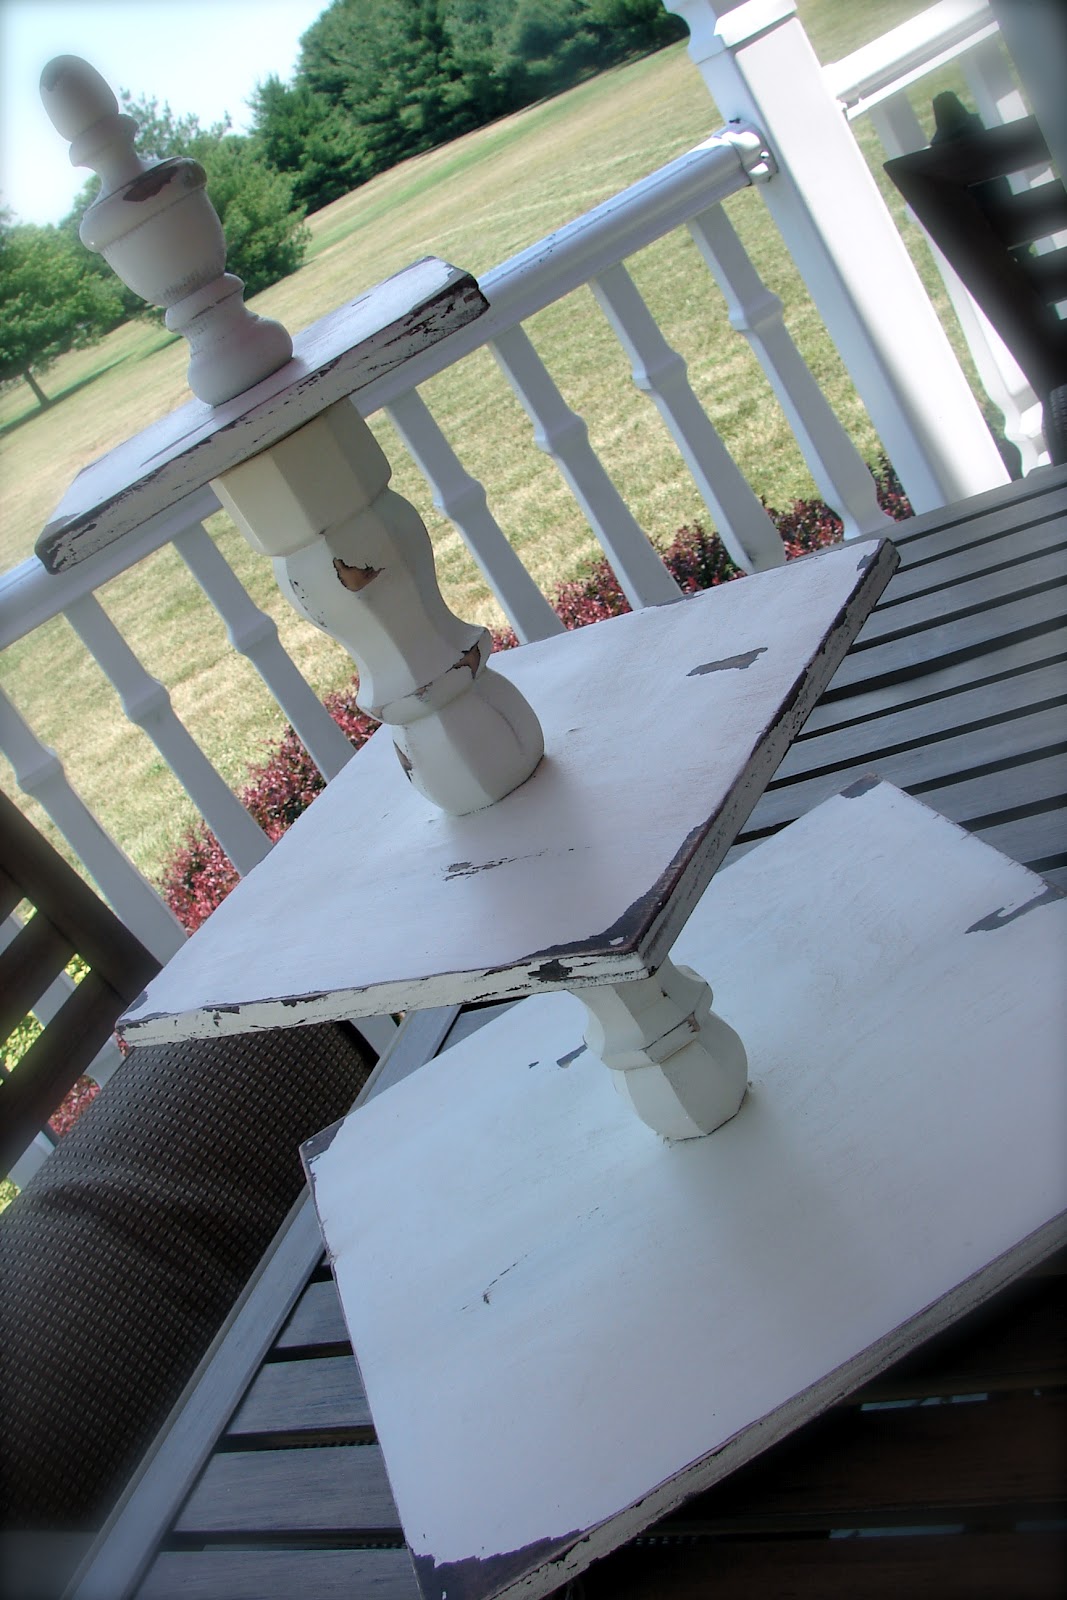
How to Make Your Own Cupcake Stand

I'm so excited to share this relatively quick and easy project with you.


 As a lover of cupcakes ~ baking and eating ;o) ~ I have always wanted a pretty way to display those luscious, tiny round cakes.  
I've had a couple inexpensive stands that just did not hold up.  And being the cheap thrifty person that I am, I could never bring myself to pay oogles of money for a really nice one.


Well, after perusing the net one day a while back, I stumbled upon this great stand handcrafted at 
Shanty 2 Chic's blog.  


Isn't it just gorgeous??!!!!  
Click here to read how Ashley created this beauty.

It became my inspiration.  
The only hurdle was not having any of the proper woodworking tools to make it.  
No worries!

I made a trip to Lowe's, bought an appropriately sized piece of maple plywood, and asked the nice lumber boy to cut it into the sized pieces I needed ~ 6, 10 and 14 inch squares.  Another trip down the furniture pieces aisle and I grabbed a few chair legs with screw plates. I'll explain the reason for the screw plates in a bit.  And lastly, I grabbed  a decorative finial for the top.  The only other supplies needed were a few cans of spray paint, and a trip to AC Moore Crafts for small unfinished wood candle holders for the feet.


After tallying up the cost of supplies purchased, I estimated the entire project to be around $30.  
Not too bad!


I wish I could say I crafted this all by myself, but Hubby did attach the screw plates to the bottoms of the top and middle tiers; although, I sooo could have done it all by myself.  You know . . . he's a dude . . . and there was a bit of power tool usage needed for the project . . . so . . . he had to get involved.

Now, the reason for the screw plates and chair legs is, as you may have guessed, so I can break it down for storage if needed.  Pretty smart, huh?!


The rest of the project was all me.  I sanded, primed, painted, distressed, antiqued, etc.  Speaking of antiquing, I used the vaseline technique to antique it.  


Again, refer to Shanty 2 Chic's blog for a tutorial on that method.  No sense reinventing the wheel here since they've done a great job explaining it on their blog.


It really was a very simple project.  Oh, I think I would have loved for it to be round, but not having the proper tools to make it round, I think it looks pretty okay being square.  Besides, everyone has a round cupcake tower, so mine is a little different :o)


And, when it's not displaying yummy cupcakes, I can use it as cute centerpiece, or in this case on my hutch decked it out with some beachy-inspired elements.


I was able to get this stand finished for my niece's bridal shower this past weekend.  She seemed a little disappointed that it wasn't hers to keep, so I think I'm going to have to whip one together for her.  


Thanks for visiting!
Leave a comment so I can get to know you.

Friday, April 6, 2012

Petite Paint Pots


We're still working on the small redo of our master bathroom.  Funny how a small reno project is taking so much time to finish.  The work officially began in this bathroom way back in July of 2010 when we had some drywall repair work done.  We're coming up close to two years of my bathroom being semi-torn apart.  
It's time to "git-r-done", don't ya think?!


Well, I guess it's not that small.  We're doing quite a bit of tiling around the whirlpool tub, the backsplashes around the tub and vanity countertop and tiling the vinyl floor.  We ordered a new vanity counter top, and I'll be painting the vanity cabinet base white.  Of course the walls will need to be painted, and for that I've had some trouble picking out a paint color. I want the colors in there to flow with the fairly new bedroom colors.

The bedroom colors:
Ceiling - "Tranquility"
Walls - "Juniper Breeze"
When describing the colors I'm going for, think of a spa feel or beach glass.  
 Those restful blues, greens, greys, light browns.

In doing this small reno of our bathroom on a tight budget, we're leaving the main fixtures - toilet, tub and shower stall. When we had this house built back in 1993, we choose a color called Dove Grey for those fixtures, which is a pale grey, and I can live with that color.  Unlike the rose, laminate countertop I picked for the vanity.  Yuck!!!  As I mentioned, we've ordered a new solid, granite-like countertop with  molded sink bowls.
What was I thinking with that rose?????  
Guess I was still influenced by the decor colors of the 80's.  


Anyway, in trying to find the right color, I used Lowe's Valspar sample paints. {I love Valspar paint!  Especially the "Hi-Def" which has a primer mixed in.  It's a good quality paint at a good price.}  
What a wonderful thing!  
Instead of committing to a gallon, you get 7.7 ozs of paint that will cover a 4 foot square area for less than $3.00.  And whatever's left over, can be used for small craft projects, etc.

The pictures below are "swatches" I painted on different walls of the bathroom where the light hits differently at different times of the day.


I really thought I wanted one of the blues up there (Blue Sail and Peaceful Slumber), but I was afraid it would like too much like a little boy's room blue, know what I mean?  So, I ditched the blue idea and I'm going with Beach House, that color in the center.  It's actually close to the color of the walls in our bedroom.  I wanted a depth of color in between the pale grey walls and the maroon accent wall I had painted umpteen years ago.  

I bet you can make a good guess on what I'll be doing this weekend!  
Or at least I better be doing ;o)
Keeping my fingers crossed I've picked the right color.


Thanks for visiting!
Leave a comment so I can get to know you.

Tuesday, November 22, 2011

This 'n That

Been pretty busy this past week

I've been working on some things for the Thanksgiving table using the items you see below.  
More on the finished product in a later post.


Also have been doing some Christmas decorating.


My house is suffering from a split personality disorder right about now.  The back of the house ~ family room and kitchen ~ is showing the signs of the harvest season, Thanksgiving.  While the front of the house ~ living room/dining room, foyer ~ is decked out for Christmas.

You see, I'm loosing a weekend in December to travel to North Carolina for Son No. 1's college graduation.  Which is certainly exciting, but not very time-convenient being the weekend before Christmas.  So I'm trying to get as much done as possible before Thanksgiving without totally transforming the house into Christmas mode. 

Speaking of Son No. 1, he flies home tonight for Turkey Day.  He'll be here only until Sunday, but then he'll be home for good in about three weeks.  I can't believe his college days are coming to an end.  Where on earth has the past four-plus years gone???


Oh, I got a new toy!!! :o)  


Well, it's not really all mine, although Hubby did set it up to read "Carla's Kindle" when it's powering up.  Frankly, I don't know how much I'll use it.  I simply don't sit around enough to play around on a tablet-thingy like this.  


I did purchase my first mag subscription, though.  At a $1.65 a month, it was a pretty good deal!   I'm not a very gadgety-type person, but I will admit this thing is pretty cool.


On Sunday I finally started painting the kitchen chairs.  I know, I know . . . I blogged weeks, months, ago about starting this project.  Needless to say I've been procrastinating.  That and the original spray gun we bought wasn't working properly.


the chair before
I've got two chairs primed and painted and one primed ready to be painted.  That leaves three more chairs and the table to do.  I'll most likely blog more about this project when it's nearly finished.  But let me tell you, using that spray gun attached to the air-compressor is the sweetest thing going for painting furniture.  The spray was perfectly fine and covered so nicely.  It was actually pretty fun to use!

Once painted, I really want to accent the chairs with glaze, but Hubby doesn't think so.  He thinks I should leave them as is.  The color is not quite white.  It's really a great color, actually, called Malted Milk.  Guess I'll wait about the whole glaze thing until I get them all done.

I may not (well, I know for pretty sure I will not!) get all the chairs and table painted by T'giving, but I don't think my family will mind sitting on a few white and a few stained chairs . . . as long as there's plenty of turkey and 'taters'! ;o)


The chairs you see above are a fairly new purchase.  I bought four of these chairs from Walmart's online store.  They're in the BH&G line (they come in black too).  Partial assembly was required, which was very easy, and  they're quite sturdy and well made.  And the best part was the price -  $38 each!  And if you have them shipped to the store for pick-up, there's no shipping cost.


I bought these chairs for a table I bought a few years back from a resale shop.  It's a double gate-leg table that is in need of refinishing.  Of course this projects been on the to-do list for a quite a while too.  My plans are to paint the legs and apron in my fave paint right now, Malted Milk, accented with glaze, and restain the top.  


It's a pretty sturdy table that can sit four comfortably, or six a little snugly.  It was a good price at $65.  Not sure if it's an "antique".  The workmanship seems good, and it doesn't really have that look of being mass produced.


I've also been playing nurse to Son No. 2 since Friday.  He had surgery to shorten a ligament on the side of his knee.  Apparently they go in and fold over the ligament to get it back to the proper length.  He has to keep that leg immobile wearing a long leg brace for three weeks, and it's been a pretty painful recovery so far.  

As for my back, it's getting better and better every week.  Perhaps my disc compression wasn't as severe as I suspected.  After eight weeks, I'm still getting twinges of pain and numbness down my leg, with occasional lower back pain on days when I'm on my feet a lot, but I'm slowly regaining strength and range of movement with each week.  Not quite back to 100% with my workouts, but I'm getting there.
Good thing!  
With the Holidays here and being extra busy, I don't know what I would have done if I was in the shape I was six weeks ago. 


Thanks for visiting!
Leave a comment so I can get to know you.

Friday, September 30, 2011

Say 'Ello to My Li'l Friend

Now, when you read that title up there, you have to do it in your best Al Pacino as Scarface voice. 


Granted my "li'l friend" isn't as deadly as a machine gun, but it's going to be my weapon of choice in the attack against my kitchen chairs. 


With all the turns and grooves in these chairs brushing would have been a nightmare.  Surely I would have used at least four cans of spray paint per chair ~ and there's six of them.  


My dear, sweet Hubby bought this spray gun that can be used with our air compressor a few weeks ago upon my request . . . okay pleading. 

But the darn weather here, for what seems like almost two weeks, has been so lousy.  Not good painting weather at all.   It's been damp and rainy.  And when it's not been raining, the humidity's been like 300%.


Finally a break! Today is clear, and not near as humid.  This weekend, and into next week, are supposed to be much better than it's been.  So now I have no excuse.  I'll be spending some time this weekend deep cleaning the dirt and grime off these chairs, lightly sanding and priming in prep for the paint.  


Hopefully within a couple weeks I'll have fresh, newly painted chairs.  
Then I'll be tackling the table . . . hopefully . . .


Thanks for visiting!
Leave a comment so I can get to know you.
Related Posts with Thumbnails